
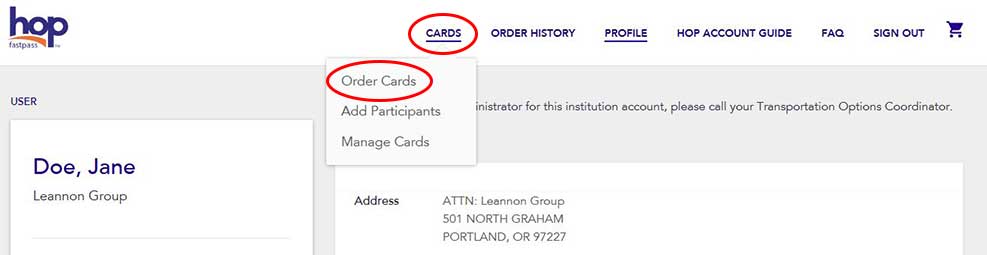
When you have a new employee, client or student who needs a Monthly Pass, you will first need to place an Order for the card(s). The TriMet Customer Support Center will receive your Order and send you your requested cards. If you have extra cards, or the new participant already has a Hop card, you do not need to order new cards from the TriMet Customer Support Center. When the cards arrive in the mail, you will need to “Add a Participant” to each card. This should be the person’s name but it could be a generic description (e.g., “Card A”). Once your card has a participant linked to it, you will be able to manage the card. In “Manage Cards,” you can load fare to cards, as well as block, replace, or remove them from the account. After the cards have fare loaded to them, they should be distributed to the participant immediately.
If you are a part of the Monthly Pass program, your new employee will need to have an Adult, Youth or Honored Citizen Hop card. You will need to order the card for the participant.
 Home page
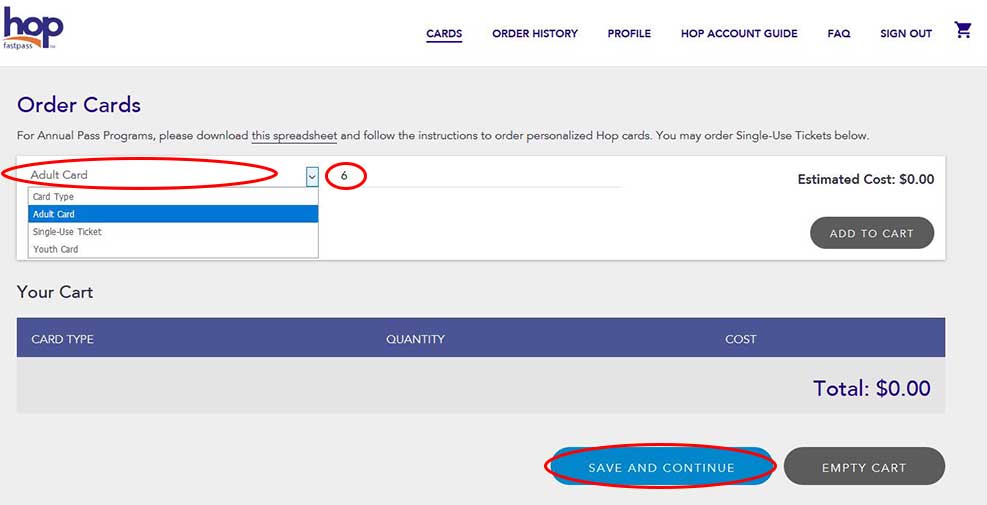 Order Cards page
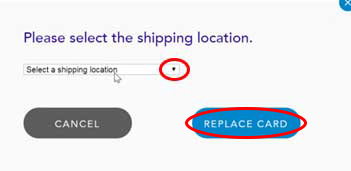 Shipping location window
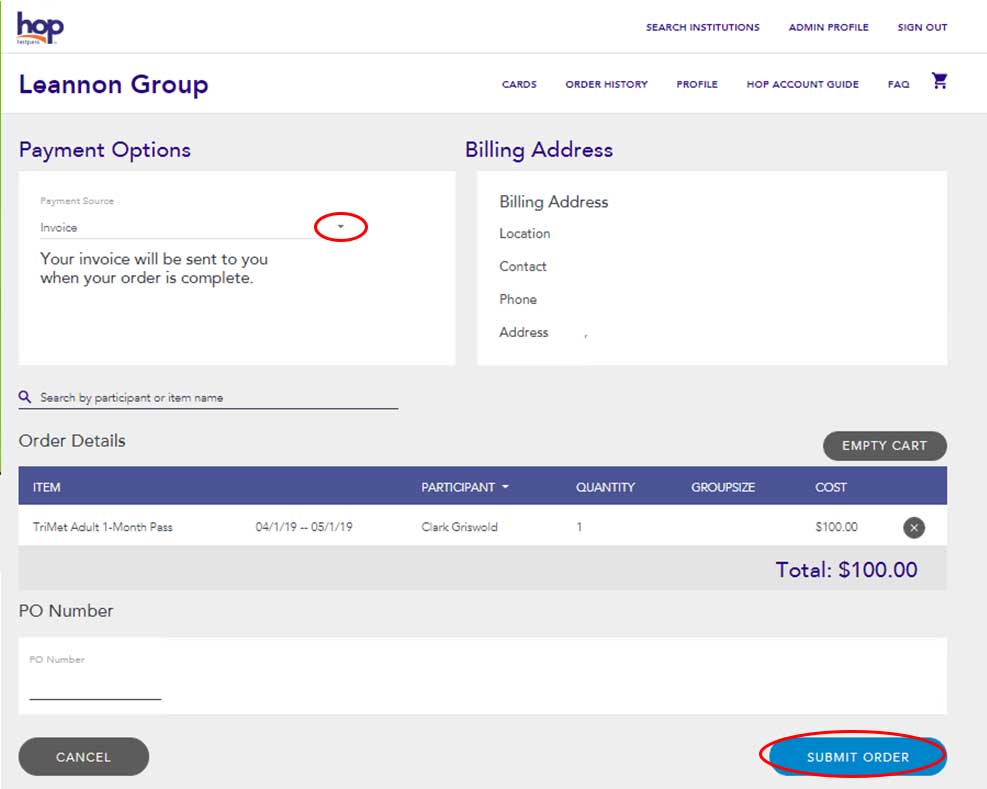
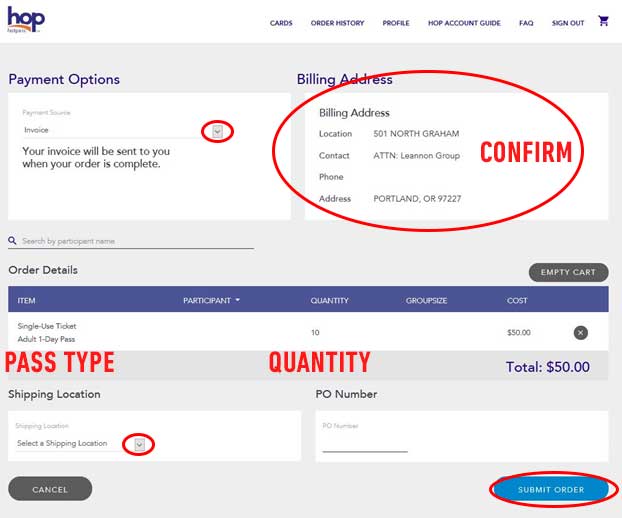 Order Confirmation page
Once you receive your employee’s Hop card in the mail, you will need to add a Participant to each card and then add a pass or tickets to the card(s).
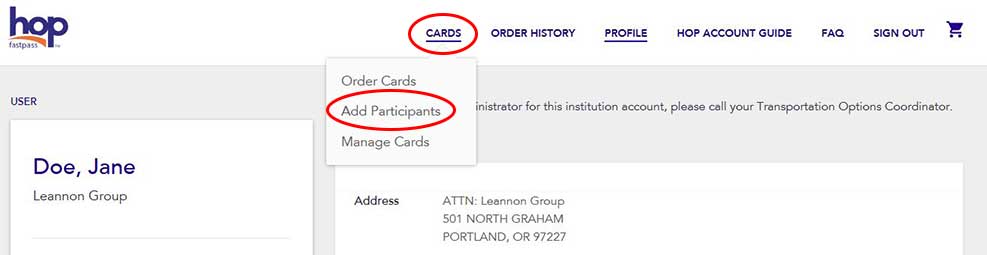
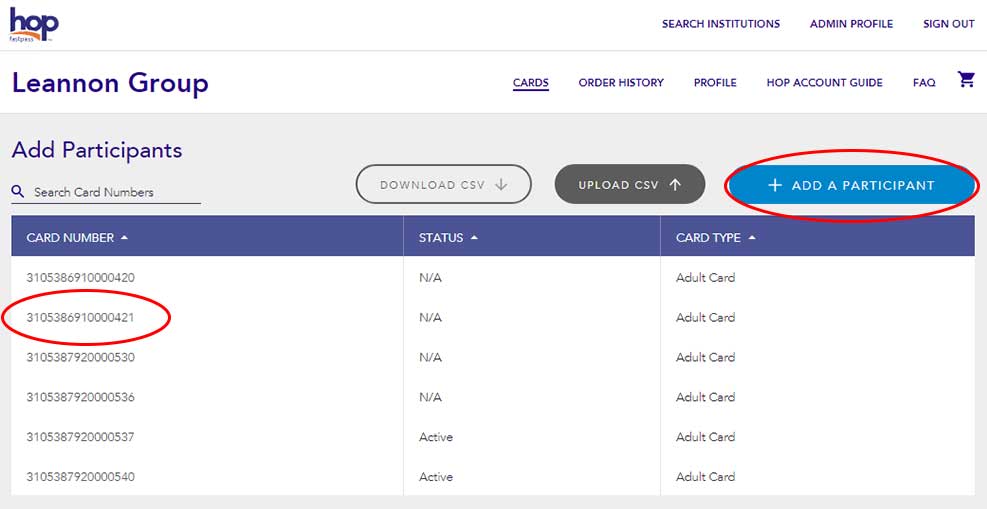
When your cards arrive in the mail, they will not have any participants assigned to them. When you log in to the Hop Institutional website, you will first need link the participants to the cards before they can be used. The cards will be identified by the 16-digit printed card number on the back of the card. After a participant is added to the card, the card will be able to be managed (load fare, etc.). You can do this for multiple employees at once.
 Home page
 Add Participants page
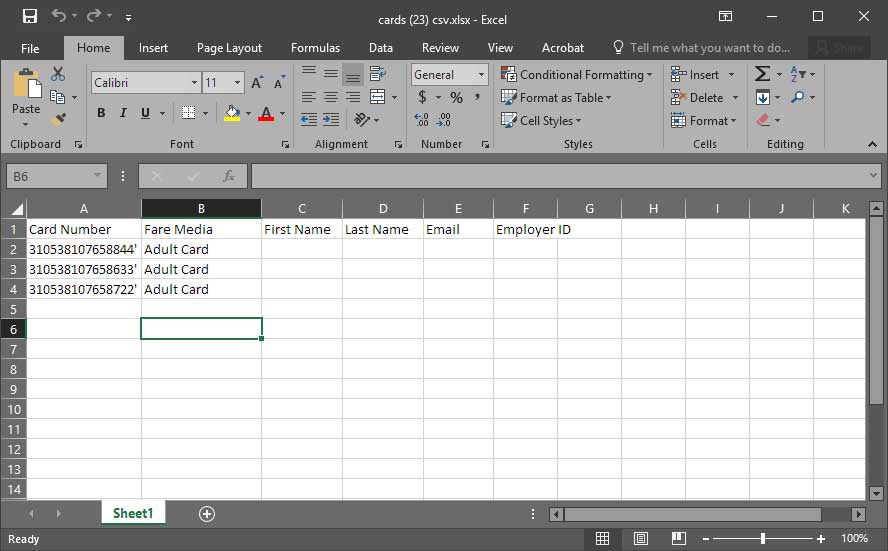 Participants spreadsheet
 Add Participants page
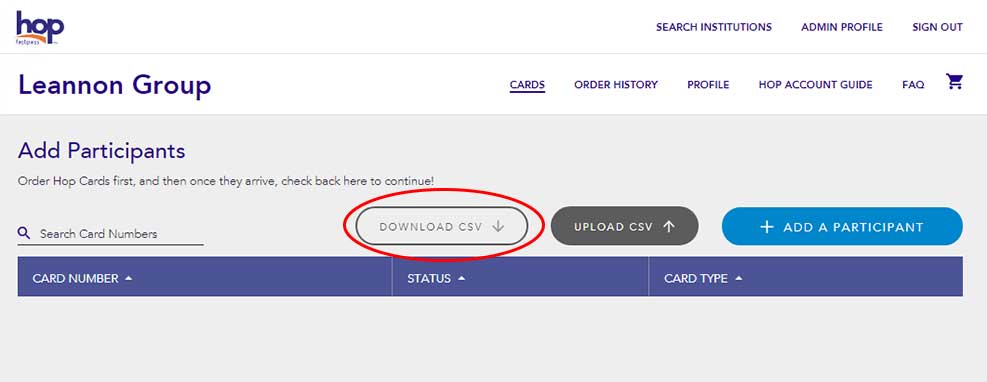
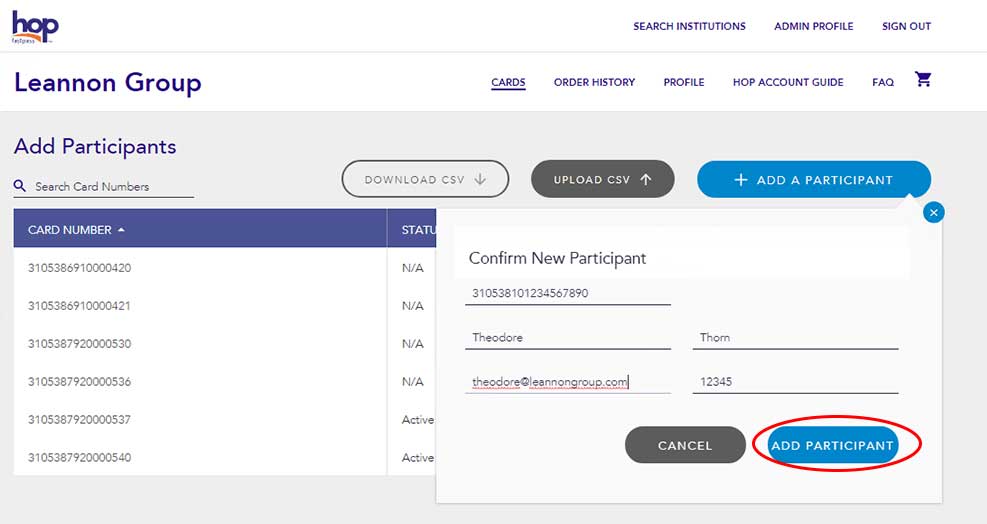
When your cards arrive in the mail, they will not have any participants assigned to them. When you login to the Hop Institutional website, you will first need to link the participants to the cards before they can be used. The cards will be identified by the 16-digit printed card number on the back of the card. After a participant is added to the card, the card will be able to be managed (load fare, etc.). This is to Add a Participant to each card individually.
Home page
 Add Participants page
 Add Participants page
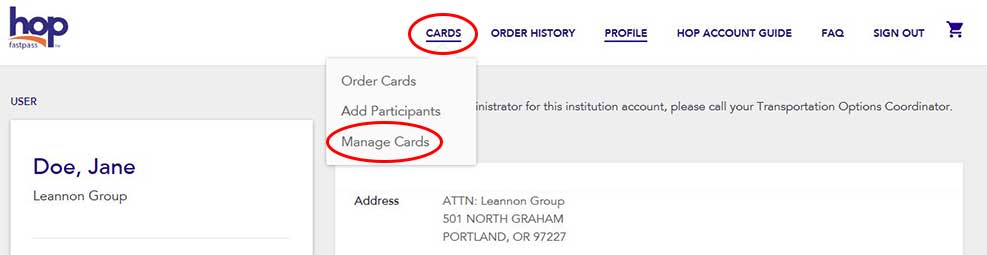
If you need to update participant information (employee name, email, etc.).
 Home page
 Manage cards page
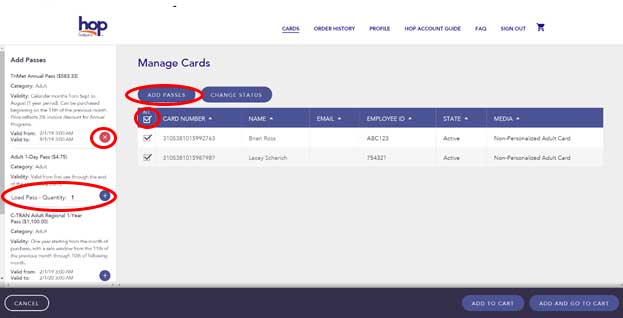
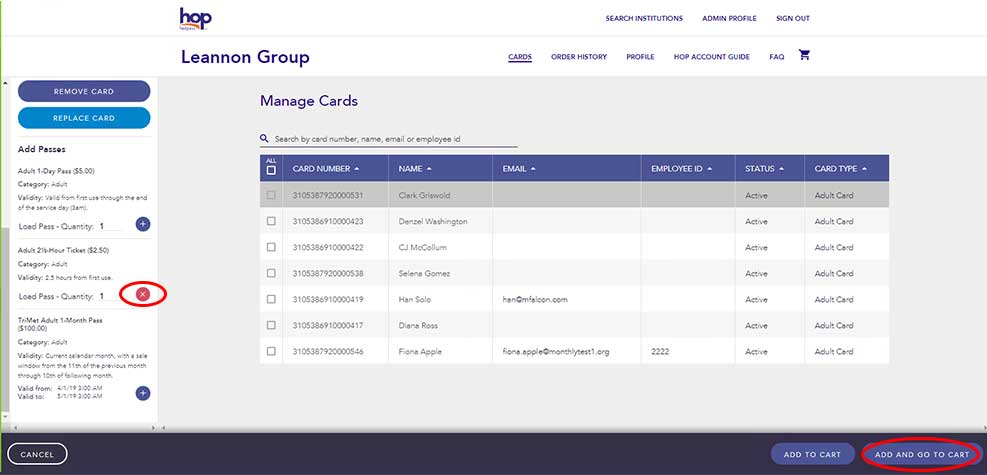
Fare must be added to cards before they can be used. You may only add passes to one “Media Type” at a time (e.g., first Adult passes and then Honored Citizen passes). You can’t add fare to cards that are blocked. Cards may only have one (1) time-based pass (e.g., 1-Month Pass) loaded at a time. Cards may have multiple (2+) first-use passes (e.g., 2 ½-Hour or 1-Day Pass) loaded at a time.
Home page
 Manage cards page
 Manage cards page
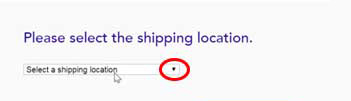 Shipping location window
 Manage cards page
If the fare you’ve purchased is valid now, the cards can be used immediately.
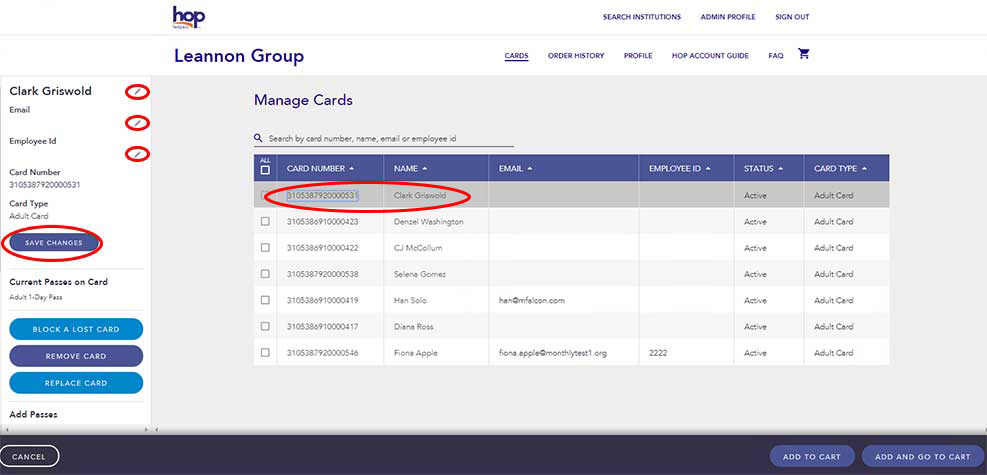
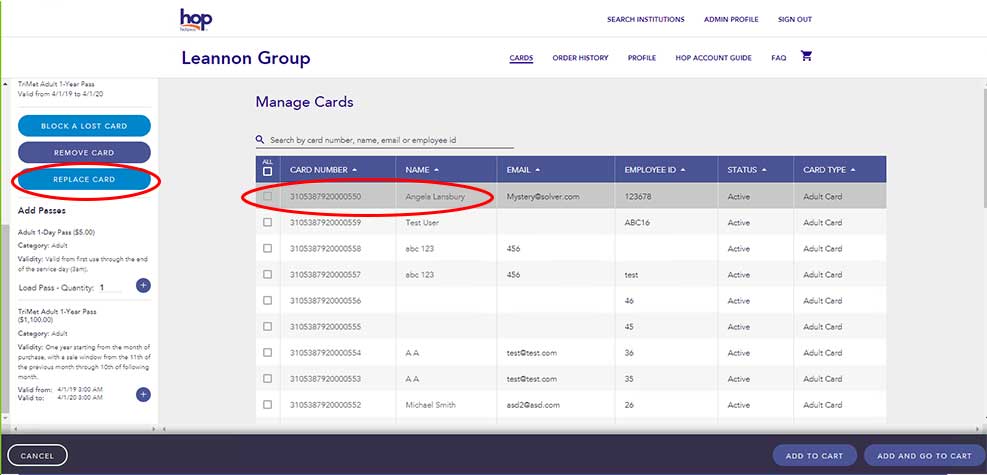
If a participant has a lost, stolen or defective Hop card, you need to “Block” the card following this process, and then request a replacement (following the “Replace Card” steps). A card that has been blocked but not replaced can be used again by unblocking it. A replaced card will become deactivated and cannot be used again.
Home page
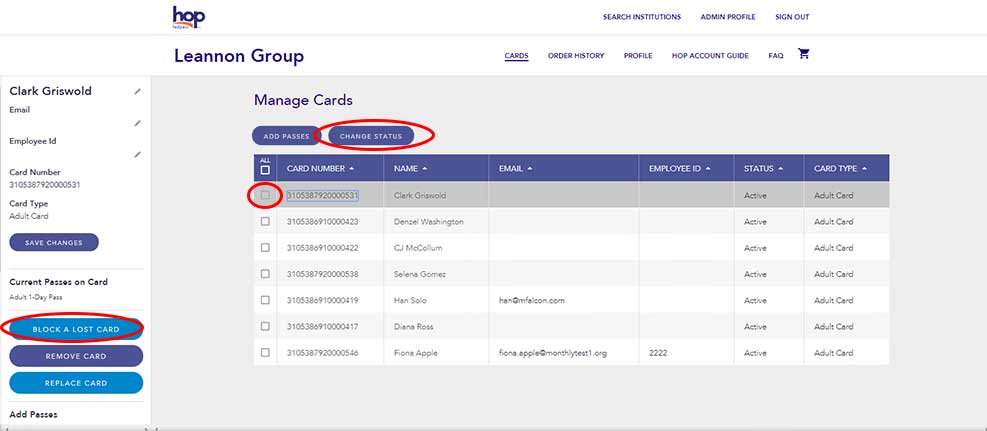 Manage cards page
A blocked card cannot be used. If the card is recovered it can be unblocked as long as it is not replaced. If a participant needs a new card, use the replace-card feature.
If a Hop card has been lost or stolen, you will need to replace the card. You should either have a stack of replacement cards, or your participant should go to a retailer and buy a new Hop card (and do not load fare — the new Hop card must not have any fare on it). Before clicking “Replace,” your spare Hop card must not have ever been previously used or have any passes or stored dollar value on it.
This new Hop card must also be the same type as the lost/stolen card (e.g., Adult or Honored Citizen). You will need to have the new Hop card’s 16-digit printed card number. After the replacement, this new Hop card will have the person’s pass and history on it, and be automatically updated on your Institutional account. The old Hop card will be deactivated.
Home page
 Manage cards page
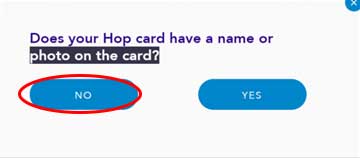 Photo/Name window
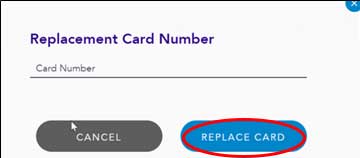 Card Number window
All information (passes, history, balance, etc.) will transfer to the new card.
This is to remove a Hop card from your Institutional account due to an employee leaving or no longer receiving fares from your organization. The card can always be added back into your Manage Cards screen at a later time.
Home page
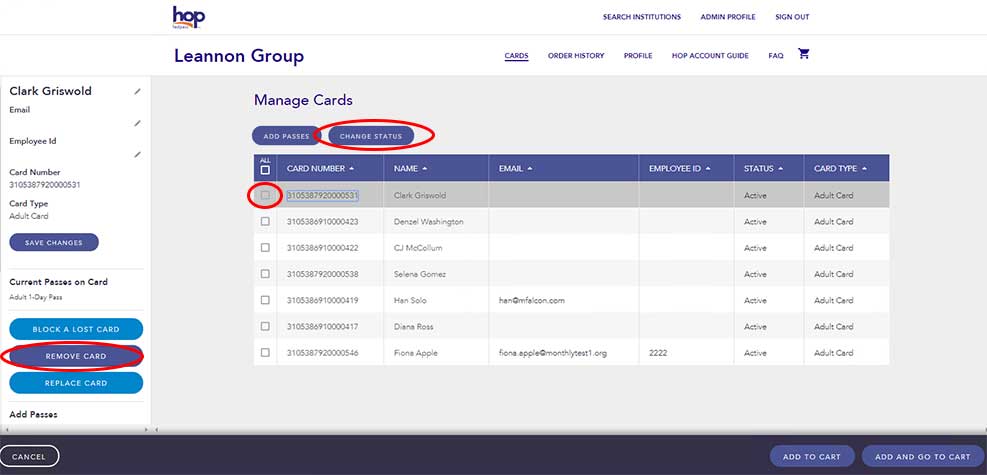 Manage cards page
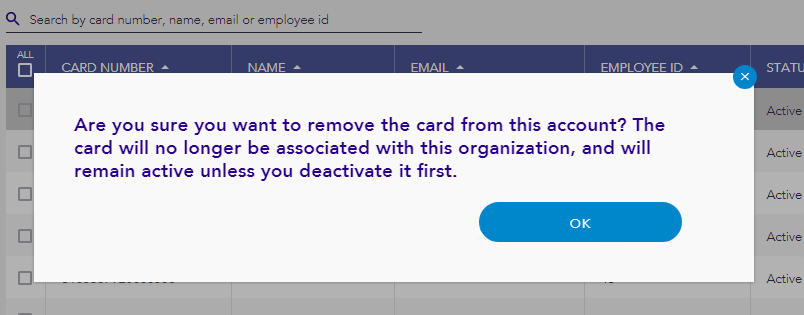 Confirmation window
The card has been removed from your organization’s account.
© TriMet • Terms of Use and Privacy Policy